Multi-Factor Authentication Setup Guide
Getting Started
This process should only take a few minutes to complete, and you will only have to do this setup once. Once setup is complete, you will only need to authenticate once per device. Please have your mobile phone and company computer ready.
Please follow these steps closely. If you are still experiencing trouble once you’ve followed these steps and downloaded the Microsoft Authenticator app, you may call (508) 217-3400 for support. Please ensure the app has successfully downloaded onto your phone prior to calling.
Step 1: Sign Into Your Email
Open Outlook. You will be prompted to authenticate your account by providing your company email address and email password. Once authenticated, you will be greeted by the pop-up seen in step 2 to begin setting up MFA.
Step 2: Begin Authenticator App Setup
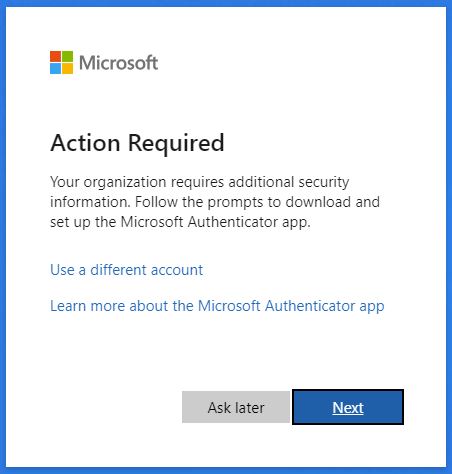
After signing in, you'll be prompted to start the Microsoft Authenticator app setup.
Click “Next” to proceed.
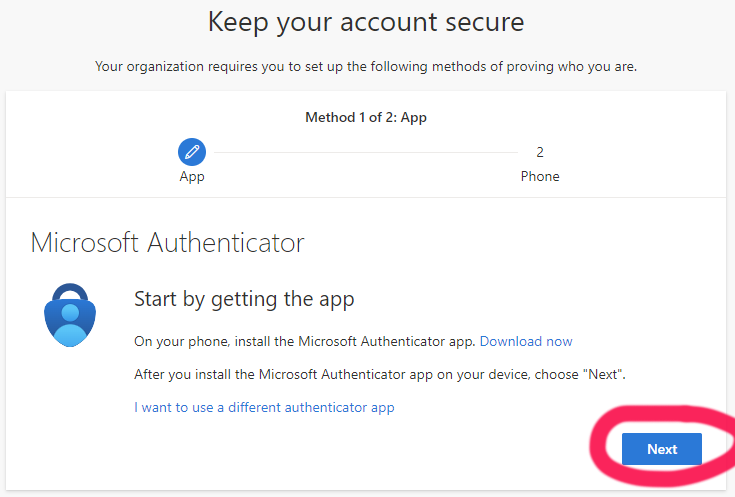
Step 3: Download the Microsoft Authenticator App
Get your mobile phone and download the app from either the Google Play Store or the Apple App Store.
After successful install on your phone, click “Allow” to allow app notifications.
On your computer screen, click “Next” on the “Keep your account secure” pop-up.

Step 4: Authenticator App Configuration
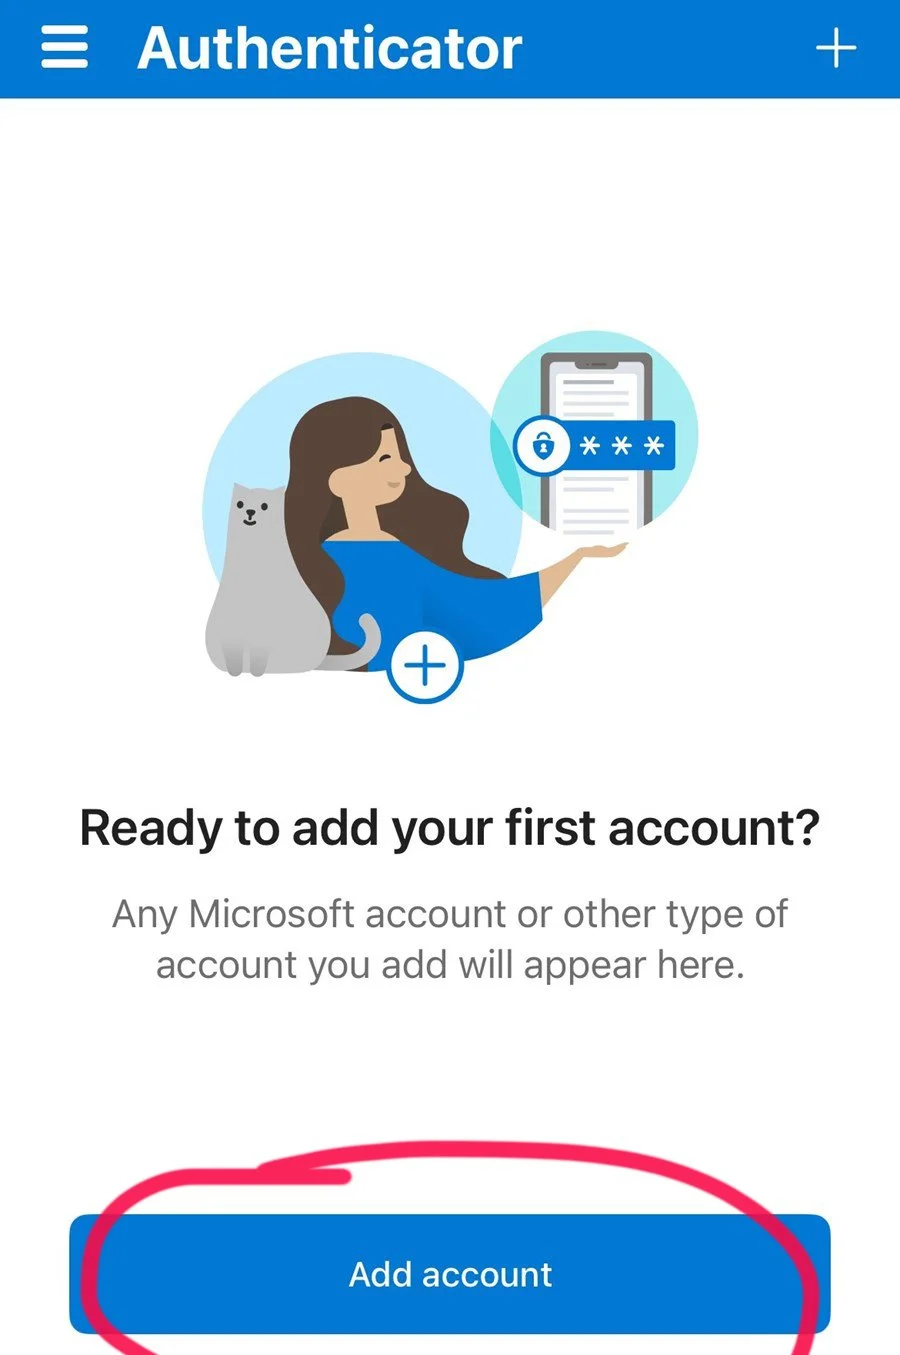
Open the Microsoft Authenticator app on your phone and select “Add account.”
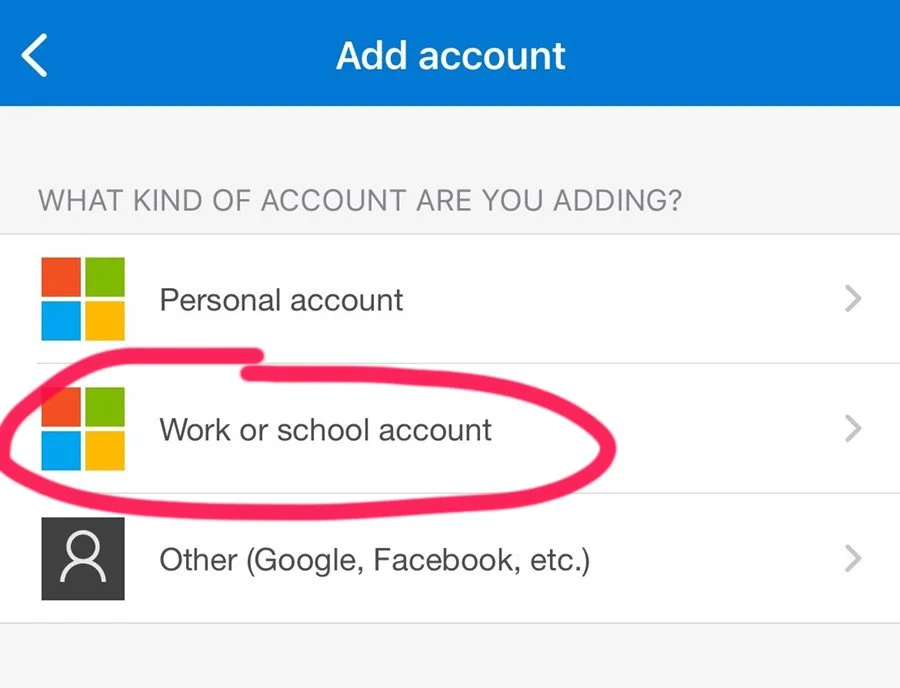
Choose “Work or School Account”.
Step 5: Scan the QR Code
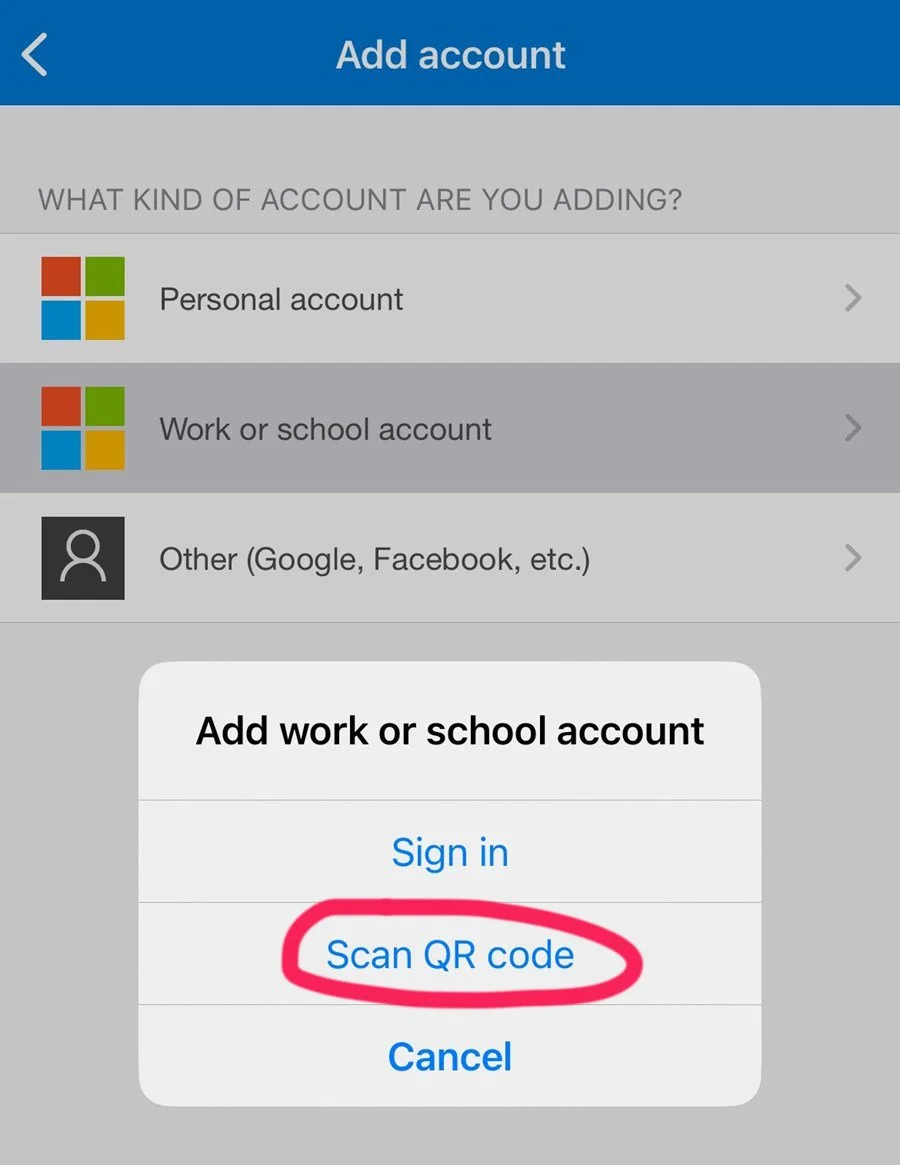
Select “Scan QR code” in the app and allow camera access.
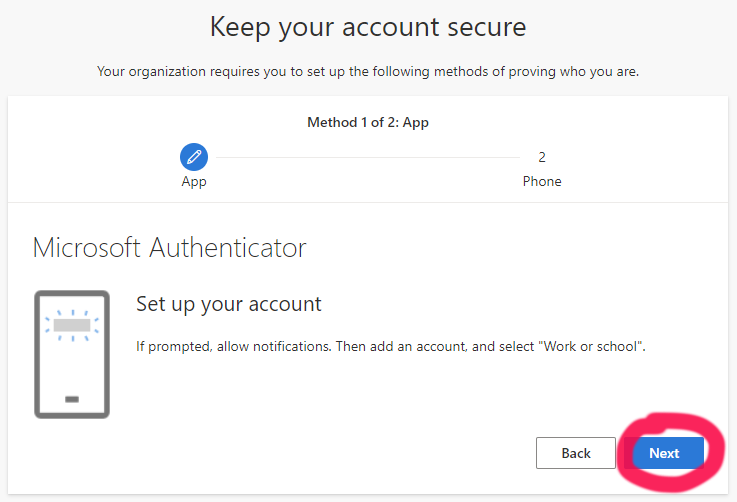
On the “Keep your account secure” pop-up on your computer, click “Next” to see the screen with the QR code.
Scan the QR code with your the Authenticator app on your phone and then click “Next” on your computer.

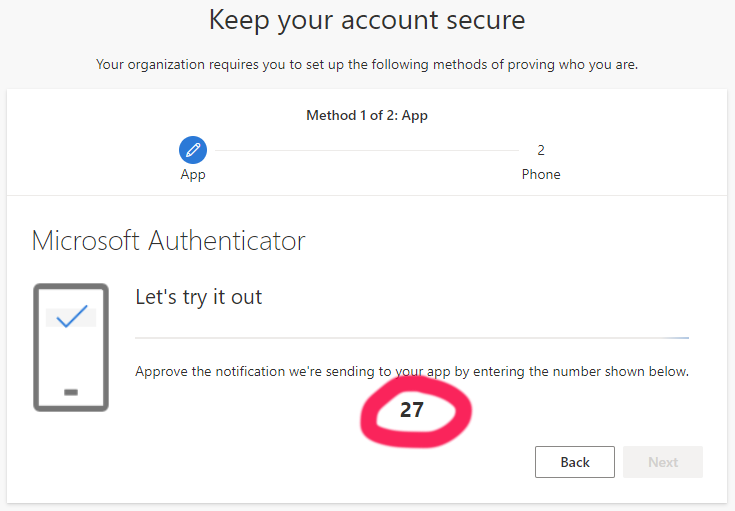
Step 6: Confirm the Setup
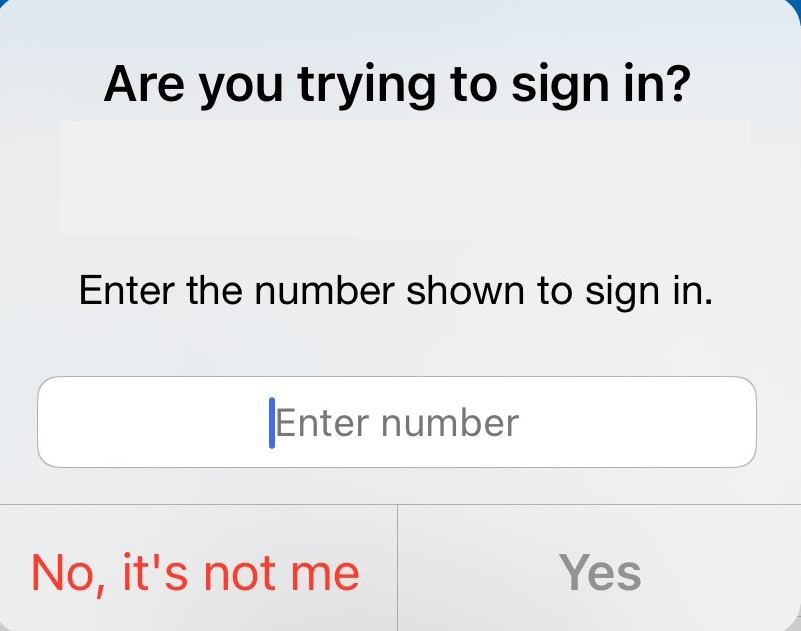
Confirm the number displayed on the “Keep your account secure” computer pop-up by entering it into your phone and selecting “Yes.”